robotics-university.com | Hello my friends, on my previous tutorial article, I have guide you to download and install LabVIEW Interface for Arduino (LIFA) toolkit file to Virtual Instrument Package Manager (VIPM) toolkit list. So we can use it to build LabVIEW application project that interfacing between LabVIEW with Arduino board.
Figure 1. Arduino Uno board
On this article, I want to invite you to introduce the LIFA toolkit package before you use it. I hope this article will make you understand about LIFA and how to use it on your LabVIEW application projects.
A. What Is LabVIEW Interface for Arduino (LIFA) toolkit?
LabVIEW Interface for Arduino (LIFA) is a LabVIEW toolkit package to build interfacing between LabVIEW with Arduino board. LIFA toolkit developed by one of National Instrumnet engineer, Sam Kristoff on 2012.
If you are a university or senior high school student who have big interest in electronic and embedded systems, I guess this toolkit is very useful for you. With this toolkit, you can build your own LabVIEW application projects but no need to spend much your money. It is compare with if you buy National Instrument (NI) data acquisition (DAQ) device like NI USB-6008 or NI USB-6216 that we know NI instrument are so high cost than Arduino board.
Figure 2. Arduino Uno Vs DAQ NI USB-6008 device
The LIFA toolkit provides an easy to use interface for the Arduino microcontroller platform. The LabVIEW Interface for Arduino allows you to quickly and easily create graphical user interfaces for virtually any component that is compatible with the Arduino microcontroller. This open source toolkit is made for customization allowing users to create custom drivers for their sensors. Please visit www.ni.com/arduino for more information.
B. Introduce to LIFA Control & Function Palette
After the LIFA toolkit has installed on VIPM, if we want to introduce the Arduino objects (On LabVIEW Controls Palette) that provided on LIFA toolkit, it can do by click the “Show in Palettes” button on "LabVIEW Interface for Arduino" installation page. See figure 3!
Figure 3. “Show in Palettes” button on "LabVIEW Interface for Arduino" installation page
Figure 4 show Arduino control palette on LabVIEW Front Panel
Figure 4. Arduino Controls palette on LabVIEW Front Panel
Figure 5 show Arduino function palette on LabVIEW Block Diagram
Figure 5. Arduino Function palette on LabVIEW Diagram Block
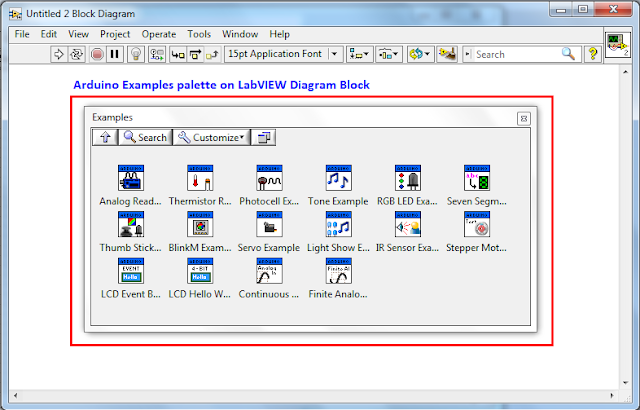
Figure 6 show Arduino example palette on LabVIEW Block Diagram
Figure 6. Arduino Examples palette on LabVIEW Diagram Block
C. Example Project on LIFA Toolkit Package
For user learning purpose, on LIFA toolkit package has been provided some example files of LabVIEW-Arduino application project. The user can learn the basic of using LIFA toolkit from this example files. So they will not face difficulty when getting started using LIFA toolkit to build their LabVIEW-Arduino application project.
To open the example directory, click “Show Example” button on "LabVIEW Interface for Arduino" installation page, after that, a files explorer window will appear for you and you can use it to start learning about how to use LIFA toolkit to build a LabVIEW-Arduino application project. See figure 7 and figure 8!
Figure 7. “Show Examples” button on "LabVIEW Interface for Arduino" installation page
Figure 8. LabVIEW-Arduino application sample project directory
If your computer operating system is Windows 64-bit, the example files saved in a directory below:
C:\Program Files\National Instruments\LabVIEW 2014\examples\LabVIEW Interface for Arduino


0 comments:
Post a Comment